Bookmark, Share Or Print This Page

Bookmark, Share or Print this page:

Search This Blog

Thursday, May 5, 2011

How To Add Adsense Ads Inside Blogger Blog Posts or Between Blog'S Posts

Adding adsense ads inside blog posts is a very good thing to do to increase your CTR.
CTR means"(the number of times your ad clicked) divided by (number of times it is shown).So,the more CTR you have,the more $$ you get.

As we know,there are more chances for the ads to be clicked when they are in the middle(blog posts) rather than at the sidebars(especially the right sidebar),footer,etc.So,


How to place adsense ads between Blog posts:

By doing this,the adsense units will be displayed between the blog posts in the homepage,archive pages and permalink(individual post pages).
Follow the procedure to do this:

1.Sign in to your blogger dashboard>click on the layout link
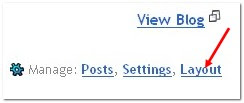
click on the layout link
2.Click on the Edit link in the "Blog Posts' column[look at the below screenshot]
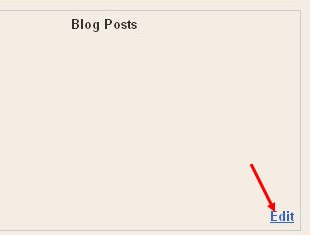
click on Edit..............a pop up window opens..........
3.Check the box next to 'Show ads between Posts'
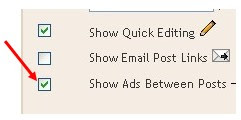
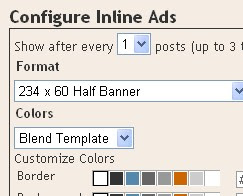
next,configure the ads,choose the format,colours,etc and SAVE THE CHANGES.configure the adsThat's it! Now your adsense ads will show between blog posts.

If you want to know how to add the adsense ads inside the blog post rather than between the post, follow this:-
Showing adsense ads inside Blogger blog Posts:-
1.Sign in to your blogger dashboard>layout>Edit html
Check the box next to 'Expand Widget Templates'
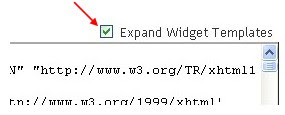


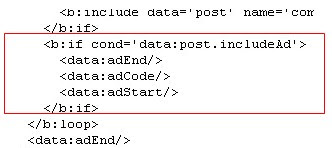
2.Scroll down the window till you see this code 

<b:if cond='data:post.includeAd'> <data:adEnd/> <data:adCode/> <data:adStart/> </b:if>


3.Replace that code in the template with the below code
<b:if cond='data:blog.pageType != "item"'> <b:if cond='data:post.includeAd'> <data:adEnd/> <data:adCode/> <data:adStart/> </b:if> </b:if>

4.Again,scroll down the template and find out data-post body tag[look at the below screenshot]
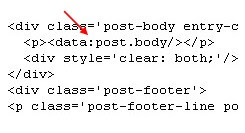
and paste the below code just above that code{this will show ads above the post body}.If you want ads to show below the post,paste the code below that tag.
Here is the code to paste:-
<b:if cond='data:blog.pageType == "item"'> <b:if cond='data:post.includeAd'> <data:adEnd/> <data:adCode/> <data:adStart/> </b:if> </b:if>
That's it!
Leave you comments if you like the post or if you have any questions doubts.

HOW TO CHANGE PRODUCT ID OF WINDOWS 7

Alter Win PID If you are running a Microsoft Windows operating system on your computer, then you are most likely aware of the fact that your PC will have a Product ID. This Product ID is a system specific alphanumeric code which is derived/calculated based on the Windows product key you use and the hardware configuration of your Computer. In simple words, Product ID is the alphanumeric code that you see when you Right-Click on the My Computer icon and select the Properties option.

Ever wondered how to alter the Windows Product ID?


It is possible to alter the Windows Product ID and change it to what ever you like. For example, you can change the Product ID and put your nickname in place of the formal Product ID displayed by the Operating System. This hack is too easy and can be done within minutes. The screenshot showing the altered Product ID is given below

Win 7 PC showing Original PID

Win 7 Product ID (Unaltered)

Windows 7 PC showing Altered PID

Win 7 PID (Altered)

As you can see from the above screenshot it is simple and easy to make your Windows display what ever you want in the place of the real Product ID. Here is a step-by-step procedure to alter your Windows Product ID.

1. Goto Start->Run and type the following in the Run dialog box
regedit

2. After you open the Registry Editor, navigate to the following key
HKey_Local_Machine\Software\Microsoft\Windows NT\Current Version

3. On the right hand side, you can see an entry by name ProductID listed under the heading Name.

4. Double-Click on ProductID, a dialog box will pop-up showing your Windows PID. Now you can delete the original PID and enter anything of your choice.

5. Once you are done, just click on OK and close the Registry Editor. Now you can see the altered Product ID in the Windows Properties window.
NOTE: This trick works on Win 7, Vista and Win XP

How To Make Blogger Blog Mobile Friendly

As you know, millions of people use their mobile phones to access internet. The mobile internet speed is also very fast these days with 3G's , mobile apps,etc.

From this, we can say many of your readers are coming to your blog through mobile phones..But, if you don't make your blog mobile friendly, .you may lose all your mobile readers because in a mobile phone, a normal blog takes lot of time to load and there are other issues that your site not fitting properly in the mobile screen.

So, here is how to make your Blogger (blogspot) blog mobile internet friendly..

NetworkedBlogs